How to Open phpMyAdmin in XAMPP Ubuntu?

Introduction
In web development, managing databases is a critical aspect of building dynamic applications. XAMPP, a widely used web development stack, simplifies this process by integrating Apache, MySQL, PHP, and Perl into a single package. Among its many features, XAMPP includes phpMyAdmin, a popular web-based tool for managing MySQL databases. In this article, we will explore how to open phpMyAdmin in XAMPP Ubuntu, allowing you to effectively manage your databases with ease.
What is XAMPP?
Before diving into the specifics of accessing phpMyAdmin, let's briefly understand what XAMPP is. XAMPP is a cross-platform web development environment that provides all the necessary components to create and test dynamic web applications locally. It includes Apache as the web server, MySQL as the database management system, PHP as the scripting language, and Perl for additional functionality. XAMPP eliminates the need to install and configure these components individually, making it a convenient solution for developers.
Setting up XAMPP in Ubuntu
To begin using XAMPP in Ubuntu, you need to set it up properly. Follow these steps to install and configure XAMPP:
- Download XAMPP: Visit the Apache Friends website and download the XAMPP distribution for Linux. Download XAMPP Ubuntu
-
Install XAMPP: Open the Terminal and navigate to the directory where the downloaded XAMPP file is located. Use the following command to make the file executable:
chmod +x xampp-linux-x64-<version>.run # Replace `<version>` with the specific version number. -
Run the Installation Script: Execute the XAMPP installation script with the following command:
sudo ./xampp-linux-x64-<version>.run-
Follow the Installation Wizard: The XAMPP installation wizard will guide you through the installation process. Choose the desired components (Apache, MySQL, PHP, and others) and select the installation directory. By default, XAMPP is installed in "/opt/lampp".
-
Start XAMPP: Once the installation is complete, Start XAMPP in Ubuntu Using the Command Line
Accessing phpMyAdmin in XAMPP Ubuntu
phpMyAdmin provides a user-friendly interface for managing MySQL databases. There are two methods to access phpMyAdmin in XAMPP Ubuntu: through the browser and through the command line. Let's explore both methods.
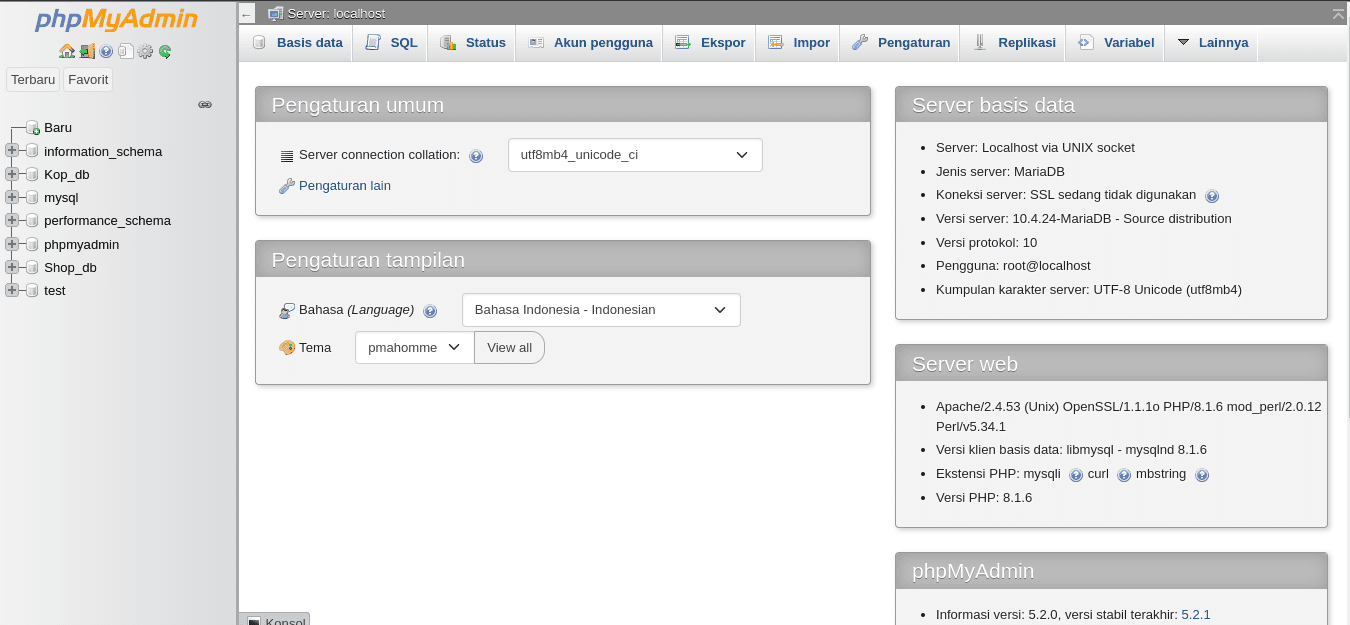
Method 1: Accessing phpMyAdmin through the browser
To access phpMyAdmin through the browser, follow these steps:
-
Open your preferred web browser.
-
Enter the following URL in the address bar:
http://localhost/phpmyadmin/ # This will redirect you to the phpMyAdmin login page. -
Enter your MySQL username and password. By default, the username is "root" and the password is blank. If you've set a different username or password during the XAMPP installation, use those credentials instead.
-
Click on the "Go" button, and phpMyAdmin will open, providing you with a comprehensive interface to manage your databases.
Method 2: Accessing phpMyAdmin through the command line
To access phpMyAdmin through the command line, follow these steps:
-
Open the Terminal.
-
Enter the following command:
/opt/lampp/bin/mysql -u root -p # This command connects you to MySQL as the root user. -
Enter your MySQL password when prompted.
-
Once you are connected to MySQL, enter the following command:
SHOW DATABASES; # This command will display a list of databases on your server. -
Locate the database named "phpmyadmin" and use the following command to access it:
USE phpmyadmin;
Now, you can perform various operations on the phpMyAdmin database using SQL queries.
Troubleshooting phpMyAdmin Access Issues
While accessing phpMyAdmin, you may encounter certain issues. Here are a few troubleshooting tips:
-
Ensure XAMPP is running: Check that XAMPP and its services (Apache, MySQL) are running properly.
-
Confirm correct credentials: Double-check the MySQL username and password you are using to log in to phpMyAdmin. If you've forgotten or need to reset the password, refer to the XAMPP documentation for instructions.
-
Check firewall settings: Make sure your firewall isn't blocking access to the phpMyAdmin page. Adjust the firewall settings accordingly.
-
Verify correct installation: If phpMyAdmin doesn't work after following the installation steps, consider reinstalling XAMPP or checking for any errors during installation.
-
Examine XAMPP logs: If you're still experiencing issues, consult the XAMPP log files to identify any errors or warnings. These logs can be found in the "/opt/lampp/logs" directory.
Conclusion
By following the steps outlined in this article, you can successfully open phpMyAdmin in XAMPP Ubuntu. Whether you choose to access it through the browser or the command line, phpMyAdmin provides a powerful interface to manage your MySQL databases efficiently. With XAMPP's comprehensive web development environment and the ease of phpMyAdmin, you'll have everything you need to build and maintain robust web applications. Get started with XAMPP in Ubuntu today and unlock the potential of database management for your web projects.